Quick Start#
This Quick Start shows you how to send your first message through MailTrigger.
We’ll start by creating an account. Then, based on whether you have your own domain, follow the path that fits your setup:
If you have your own domain (e.g.
example.com), we’ll walk you through verifying it and sending email through your custom mailbox (likesupport@example.com).If you don’t have a domain, don’t worry — MailTrigger gives you a free
@mailtrigger.appmailbox (likebob@mailtrigger.app) so you can test things right away.
Step 1: Create Your Account#
Visit MailTrigger and click Sign Up.
After completing the email verification process, log in to MailTrigger.
If You Have Your Own Domain#
If you own a domain (like example.com), you can unlock the full power of MailTrigger — including sending and receiving emails using addresses like alerts@example.com or support@example.com.
This section will guide you through verifying your domain, creating mailboxes, and sending your first test message.
Step 2: Verify Your Domain#
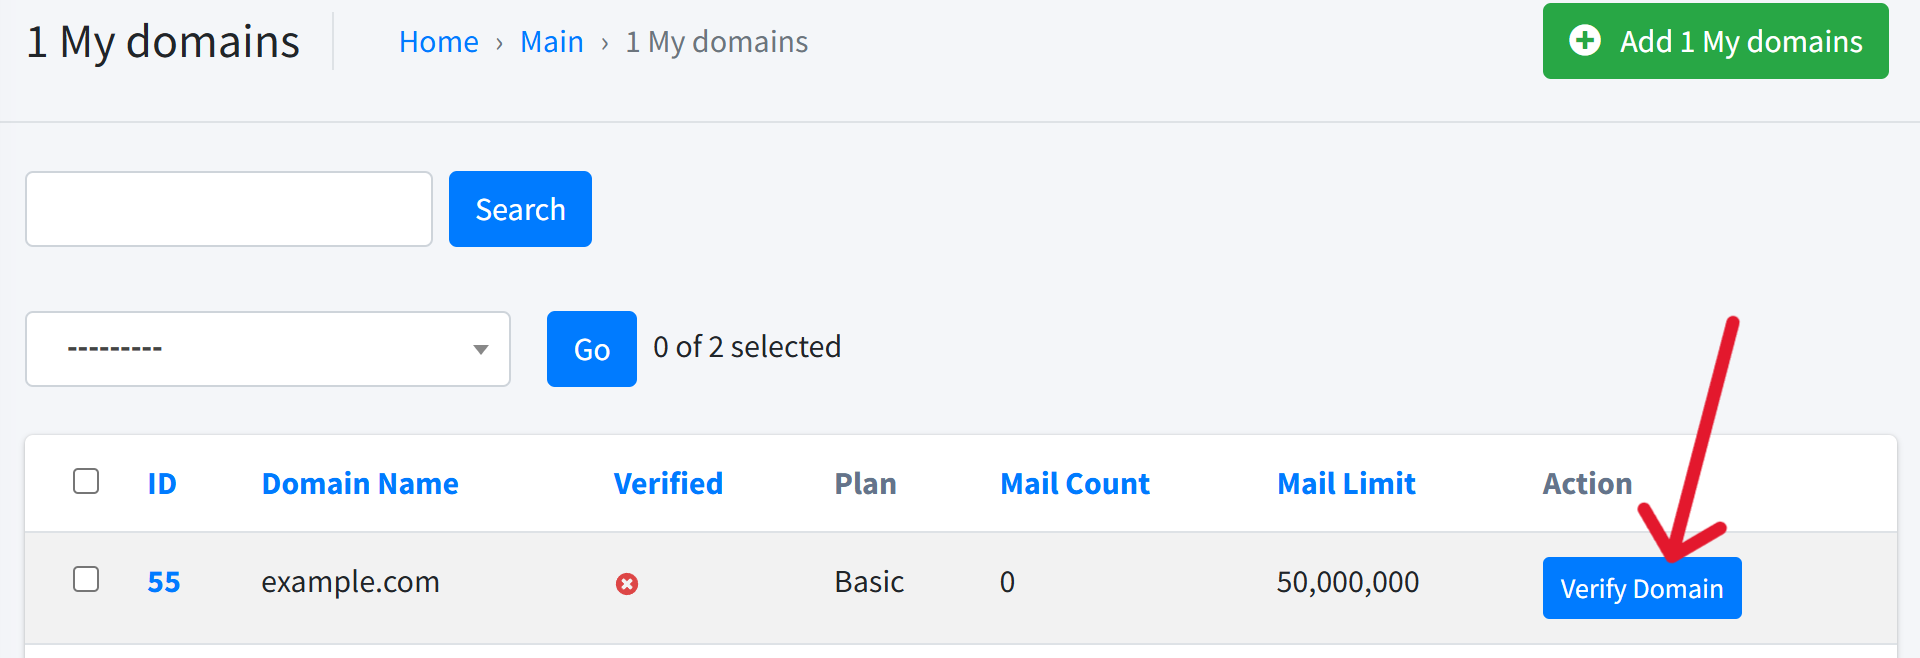
Domains → Add Domain. In the dialog,
provide: Domain Name – e.g.
example.comClick Save to add the domain to MailTrigger

After saving, MailTrigger will display DNS verification instructions. In your DNS provider’s dashboard, create a TXT record using the verification token shown by MailTrigger.

Click the Verify Domain button
MailTrigger will check the DNS record — a green Verified badge confirms that your domain is successfully verified.

Step 3: Create Mailbox#
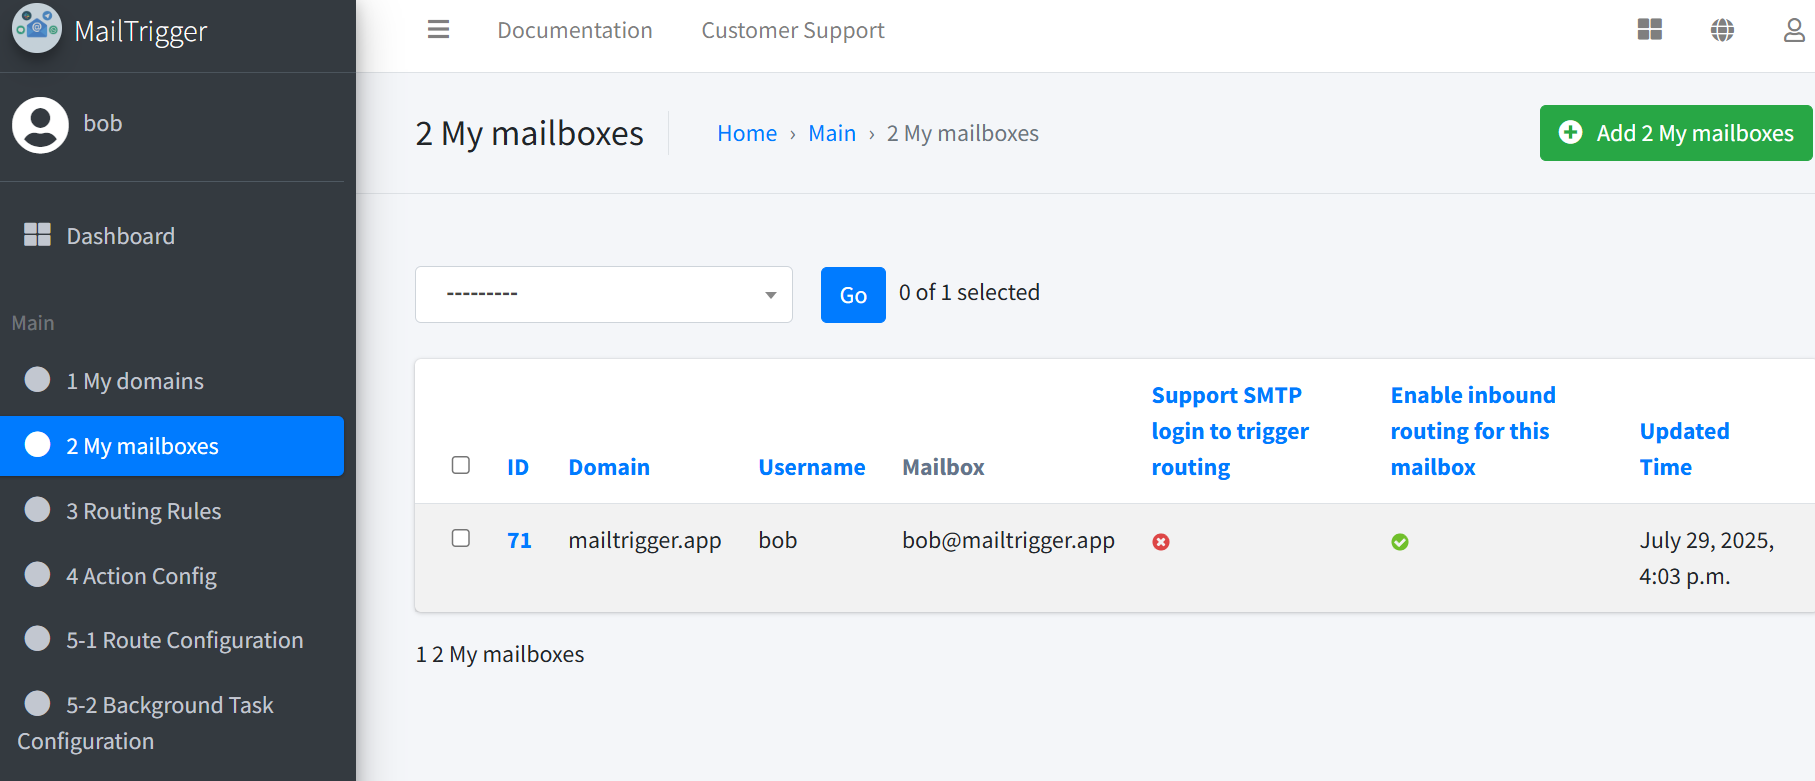
Mailboxes → Add Mailbox.
Select the verified domain, set the username (e.g.
bob), and set a password.
Note
A mailbox is an email address like bob@example.com that you will use to log in (authenticate) when sending email via MailTrigger’s SMTP server.
Note
If your domain does not have an MX record, MailTrigger may not be able to automatically configure outbound email routing. Be sure to read the sections on:
after you finish verifying your domain and creating your mailboxes.
Default SMTP to Origin Route#
When you create a new mailbox, MailTrigger will try to automatically add a SMTP to Origin route, so you can send email immediately — no manual setup needed.
What does “SMTP to Origin” mean?
MailTrigger acts as a proxy for SMTP to Origin routes — it does not send the email directly itself.
Instead, it connects to your domain’s actual SMTP server (as determined by the MX record) and sends the message through that server.
Once this route is triggered by a matching sender, MailTrigger sends the message through your domain’s real SMTP server.
Note
In MailTrigger, a Rule decides when something should happen, an Action defines what to do, and a Route connects them together into a workflow.
For a deeper understanding of these terms, see the Key Concepts section.
This default setup includes:
Rule – Triggers when the sender is the mailbox address (e.g.
bob@example.com)Action – A single SMTP action, pre-filled with:
SMTP Host: the highest priority MX host for your domain
Port: 587 (TLS)
Username/Password: your MailTrigger mailbox credentials
Route – Links the rule and action together. It triggers only if the sender exactly matches the mailbox address.
Note
This automatic setup will only occur if both of the following conditions are true:
The mailbox’s domain (e.g. for
bob@example.com, the domain isexample.com) has MX recordsMailTrigger finds an MX record that is:
The highest priority (lowest preference value)
And does not point to MailTrigger’s own SMTP server (
smtp.mailtrigger.app)
If both conditions are met, MailTrigger assumes your domain already has its own email delivery setup and creates a default route to send outgoing emails through that server. In this case, you can proceed directly to Step 4 Send a Real Email from the Command Line.
Warning
Check Your SMTP Credentials
The SMTP action uses your MailTrigger mailbox credentials by default.
If these credentials are not the same as your actual mail provider’s SMTP login, you must update the action and enter the correct username and password.
If the credentials do match, you don’t need to change anything — you’re ready to proceed with testing.
Manual Setup (If Your Domain Has No Valid MX Record)#
Note
If your domain already has a valid MX record that points to your own SMTP server
(not smtp.mailtrigger.app), MailTrigger will detect it and set up the route automatically.
In that case, you can skip this section.
If your domain lacks MX records entirely,
or the only MX record points to smtp.mailtrigger.app,
MailTrigger won’t be able to detect your external SMTP server.
In these cases, you’ll need to manually create an SMTP to Origin route to relay messages through your own SMTP provider.
Here’s how to set it up step-by-step:
Create a Rule
Navigate to the Rules tab, then click Add Rule.
Trigger Type: Sender Is
Value: Your full mailbox address (e.g.
bob@example.com) This ensures the rule will only trigger when this mailbox sends a message.
Click Save.

Create an SMTP Action
Go to the Actions tab, then click Add Action → choose SMTP And Name the action

Click ‘Save and continue editing’, then fill in the fields:
SMTP Host: The hostname of your external SMTP provider (e.g.
smtp.yourdomain.com,smtp.sendgrid.net,smtp.gmail.com, etc.)Port:
587(recommended for TLS)Use TLS: Yes (enabled)
Username: Your login name for the external SMTP server
Password: Your password or app-specific password for that SMTP account
Click Save.

Create the Route
Now go to the Routes tab, and click Add Route.
In the form:
Mailbox: Choose the mailbox you want to apply the route to (e.g.
bob@example.com)Rule: Select the rule you just created (e.g. “Sender is
bob@example.com”)Actions: Select the SMTP action you created
Enabled: Make sure this is checked
Also, name the route (e.g.
SMTP to Origin (Manual)), then click Save.

Once saved, the route becomes active immediately. Any email sent from the specified mailbox will now be relayed through the SMTP server you configured.
Step 4: Send a Real Email from the Command Line#
Windows (PowerShell)#
Send-MailMessage -From "bob@example.com" `
  -To "your receiving email address" `
  -Subject "Test from MailTrigger" `
  -Body "Hello from MailTrigger CLI test" `
  -SmtpServer "smtp.mailtrigger.app" `
  -Port 587 -UseSsl `
  -Credential (
      New-Object PSCredential "bob@example.com" `
          (ConvertTo-SecureString "YOUR_MAILBOX_PASSWORD" -AsPlainText -Force)
    )
Linux (swaks)#
To install swaks, please refer to the Official Installation Guide.
swaks --to your receiving email address \
      --from bob@example.com \
      --server smtp.mailtrigger.app \
      --port 587 --auth LOGIN \
      --auth-user bob@example.com \
      --auth-password YOUR_MAILBOX_PASSWORD \
      --tls \
      --data "Subject: Test from MailTrigger\n\nHello from MailTrigger CLI test"
Expected Results#
Your recipient inbox should receive an email titled “Test from MailTrigger”.
You can view the result in Route Logs / Action Logs inside MailTrigger.
Note
The password used in the above commands refers to the mailbox password you set inside MailTrigger when creating the mailbox (e.g., for bob@example.com).
If You Don’t Have a Domain#
You can start using MailTrigger right away, even if you don’t own a domain.
This part will walk you through using MailTrigger without needing to configure DNS records or verify any domains.
Get Your Free Mailbox Address#
When you create your account, MailTrigger automatically gives you a free mailbox address like:
{username}@mailtrigger.app
For example, if your username is bob, your address will be:
bob@mailtrigger.app

You can receive and forward email using this address — no DNS configuration or domain verification required.
What’s Next?
You’ll learn how to send an email to your free MailTrigger address and see how it gets automatically forwarded back to your inbox, confirming that everything is set up correctly.
Understand the Goal#
What you’ll do:
Send an email from your personal inbox (e.g.
bob@gmail.com) tobob@mailtrigger.app
What should happen:
MailTrigger will automatically forward the email back to your inbox (e.g.
bob@gmail.com)
You should receive:
Subject:
Fw: Test Forwarding(MailTrigger adds a ``Fw:`` prefix to the original subject)Body:
❤️❤️❤️ This is a test message ❤️❤️❤️(MailTrigger decorates the original body)
This confirms that your:
Rule (matches receiver)
Action (forwards email)
Route (connects both)
are working together correctly.
Step 2: Create a Route for Your Built-In Mailbox#
Note
In MailTrigger, a Rule decides when something should happen, an Action defines what to do, and a Route connects them together into a workflow.
For a deeper understanding of these terms, see the Key Concepts section.
Rule – Match receiver =
bob@mailtrigger.appAction – Forward via SMTP
Example parameters:
Name:
Forward to my GmailReceiver:
bob@gmail.comSubject:
Fw: $SUBJECTBody:
❤️❤️❤️ $BODY ❤️❤️❤️
Note
$SUBJECTand$BODYare placeholders that will be replaced with the original subject and body of the incoming email. You can use them to customize the forwarded message dynamically.For full details and more examples, see Inline Variables for Actions.
Route – Tie the rule and action together
Step 3: Send a Test Email to Your MailTrigger Mailbox#
You can test this setup using any external mail client (like Gmail), or from the command line.
Using an External Mail Client (e.g. Gmail)#
This is the recommended method for testing, as it is the quickest way to verify that your forwarding route works as expected.
Compose a new email from your personal inbox and send it to bob@mailtrigger.app.
If everything is set up correctly, the message should automatically be forwarded to your real inbox (e.g. bob@gmail.com) by the route you just created, with:
Subject prefixed by
Fw:Body wrapped with
❤️❤️❤️symbols
Using the Command Line#
Note
If you are using Gmail to send the test message, you must use an App Password instead of your regular Gmail password. For instructions, see the Gmail App Password guide.
Windows (PowerShell)#
Send-MailMessage -From "alice@gmail.com" `
  -To "bob@mailtrigger.app" `
  -Subject "Test Forwarding" `
  -Body "This is a test message" `
  -SmtpServer "smtp.gmail.com" `
  -Port 587 -UseSsl `
  -Credential (
      New-Object PSCredential "alice@gmail.com" `
          (ConvertTo-SecureString "YOUR_GMAIL_APP_PASSWORD" -AsPlainText -Force)
    )
Linux (swaks)#
To install swaks, please refer to the Official Installation Guide.
swaks --to bob@mailtrigger.app \
      --from alice@gmail.com \
      --server smtp.gmail.com \
      --port 587 --auth LOGIN \
      --auth-user alice@gmail.com \
      --auth-password YOUR_GMAIL_APP_PASSWORD \
      --tls \
      --data "Subject: Test Forwarding\n\nThis is a test message."
Expected Results#
Your real email (e.g.
bob@gmail.com) should receive the message.The forwarded email’s subject will be
Fw: Test Forwarding.The body will be
❤️❤️❤️ This is a test message ❤️❤️❤️.You’ll also see the route run successfully in Route Logs / Action Logs.
Note
This is just a simple example to help you get started quickly.
MailTrigger supports much more powerful workflows — such as conditional routing, LLM-powered auto-replies, webhook integrations, multi-step pipelines, and more — so you can tailor it to your real-world needs as they grow.
(Optional) Incoming Mail for Custom Domains#
This section applies only if you have your own domain (e.g., example.com).
By enabling Support Incoming on a MailTrigger mailbox (e.g., bob@example.com),
you allow MailTrigger to receive emails sent to that address and trigger the routes
configured for that mailbox — just like how it processes outgoing messages.
Enabling Incoming Email Support#
In your DNS provider, create an MX record pointing to
smtp.mailtrigger.app. Make sure this MX record has the highest priority, so MailTrigger will be the first to receive emails sent to your domain.In MailTrigger, edit the mailbox and enable Support Incoming.
Send a test email to
bob@example.comfrom any external email account, or refer to send an email from the command line.
Note
MailTrigger does not provide IMAP access. To read your emails, continue using your existing mail client or mail provider.
Relay to Origin Route#
When you enable Support Incoming, MailTrigger automatically creates a fallback route called Relay to Origin.
This ensures that emails are forwarded to your original mail provider so you can still read them in your usual inbox.
This route is automatically configured as follows:
Component |
Value |
|---|---|
Rule |
Receiver = ``bob@example.com`` |
Action |
Relay Action — relays the message to your real SMTP server (from domain setup) |
This setup allows MailTrigger to automate message handling while still preserving normal email delivery.


